Organizing Your Teacher Prep to Work Less On Weekends

Saturday, December 8, 2018
How often do you hear teachers talk about working all weekend? I was one of those teachers too. After several years of working constantly at work and throughout the weekend, I had had enough. Very few other professions have you working 24/7. Why should teachers be doing the same? It's not cool to work all nonstop, nor is it fun.

I decided to make the most of my teacher prep times throughout the week so that I could work less (and sometimes not at all) on the weekends.

Before you say anything ... before you doubt me... just think: What if you could do this too? Think of all the time you'd have to be an actual real human on the weekends!


Have a Plan
The very first thing you'll need to do is make a prep schedule. My prep schedule is set up weekly - Monday through Friday (NO weekends, remember??!!).  It also includes all of the times throughout the day that I could get work done at school. That doesn't mean that I work through every prep time, but I do work through most of them.

The times I have chosen to include on my prep schedule are: before school, prep, lunch, and after school. I'd also like to be clear here. When I say "after school", I don't mean until after 5pm every night. I do have a family I like to get home to and the whole purpose of this is to feel like I'm not living at work or bringing work home with me every day. But more on that later.

After you decide when you'll work, decide what tasks you'll accomplish during each prep time. Here's a peek at what this looks like for me:


Stick to It
Sticking to your plan can be difficult, some weeks more than others. Things come up and we have to adjust. Here are a few tips to help you stick to your plan:
  • Print your Prep Schedule and hang it somewhere you'll be able to see it while working throughout the day. 
  • Close your door during your prep times. I love, love, love my colleagues, and sometimes we take breaks and chat, but if you want to stick to your prep schedule, you'll need as few distractions as possible. 
  • If you are going to have to bring work home, prioritize & pick preferences. Make sure the things you can only get done in your classroom get done. Leave anything that could be done at home or that you don't mind doing at home for last. For me, that's printing and laminating. Who else loves using their personal laminator?? 

Set Boundaries
Set boundaries for yourself. Don't work through every lunch. Don't stay late after school every day. For me, there are 1-2 days a week I might stay later. Those are our team planning days and sometimes one other day. 

Set a rule about when you'll leave. I set a rule for myself that on days I'm not staying later, I'll leave at 3:30. At my school, the kids are all dismissed by 2:45 so that gives me 45 minutes to get a few things checked off my to-do list after school. If I'm focused, there's no reason I can't accomplish a good amount in that time. 

I personally don't mind working through my lunch, but maybe you do! If you don't want to work through every lunch, then don't. At my last school, that wouldn't have even been an option because we had to have lunch with the kids. To make up for that, I tried to get to work earlier so that I didn't have to stay later. At my current school, I am not on lunch duty so I've chosen to use that time to cross things off my to-do list rather than having more to bring home with me.


Reward Yourself 
You work hard. Seriously. Your job can be difficult, exhausting, and extremely busy. You deserve breaks every now and again! When I get everything done on my to-do list, I don't look for more to do. Instead, I give myself a break!

For instance, if I get all of my Wednesday tasks done by the end of my prep time, I don't look for reasons to stay after school. I give myself a break and head home early that day. Why? I deserve it. And you do too. When you get what you need to get done, go home. Or take the rest of your lunch to just relax.

I have 2 editable versions of my prep schedule that you can download and use for free. They can be found by clicking here.

Do you have teacher tips for productivity throughout the week? Leave them in the comments below!


COMMUNITY HELPERS WEEK IN KINDERGARTEN

Sunday, September 30, 2018
Alright teacher friends, I'm going to be honest. It's difficult for me to fit everything into our daily or even weekly schedule. There are days that I don't get to content (science / social studies) and I feel truly guilty about it because it's not less important than the other subjects.

For this reason, I've made it my goal to integrate various subjects throughout my day. Today I'm sharing with you how I integrated Community Helpers into various parts of our day.


STUDENT ARRIVAL
During our Community Helpers unit, I dressed up as a different community helper each day. I didn't go crazy (this year). I kept it simple with some dress-up hats I had available in the classroom.

Each morning I greeted my students at the door in my community helper outfit. The kids loved it! They really got a kick out of seeing me in different hats and accessories. It also made them curious about why I was dressed differently and what we would be doing.

MORNING MEETING
Typically during the Share portion of our Morning Meeting, students are allowed to choose whatever they'd like to share. For this week, our share topic was "What do you want to be when you grow up?". It was fun to hear the students say they wanted to be a certain community helper after we had talked about a few.
Kindergarten Morning Meeting: Community Helpers Message & Activity
Our Morning Message and Activity were integrated during Community Helpers week. Students had to answer the question: "What community helper is Mrs. Palovchik dressed as?". Then, I passed out cards with various things different community helpers need to do their jobs. If they had a card that I needed, students moved to one side of the carpet. If they had something that I didn't need, they moved to the other side. Then we talked about what I needed vs. what I didn't need and why.

SOCIAL STUDIES
During this time of our day, I kept it simple. I introduced a community helper and we talked about what we already knew. Then I read a book about these community helpers and we filled in a chart using pictures to detail tools the community helper needed and how they helped our community. Here are some fantastic community helper read alouds (affiliate links):
Busy People: Doctor by Lucy M. George
Busy People: Teacher by Lucy M. George
Busy People: Firefighter by Lucy M. George
(ok so really all of her Community Helper Books!)

MATH
We did not have math in our classroom during Community Helpers week! Instead, we imagined that our classroom was a place called: Kinder Community. I created a Community Helpers Themed Math Task that allowed students to practice counting and their knowledge of community helpers. It was a hit! I displayed pictures of community workplaces (thank you, Google) and bags with different community helpers inside.
 

Students worked together to answer the question: "How many community helpers work here?" by counting the community helpers inside one of the bags.

Community Helpers Math Task for Counting

After counting, they filled in a sentence frame for our class chart and completed a recording sheet to demonstrate that they understood the correlation between an amount of objects and a number. How adorable is this students' recording sheet??

Community Helpers Math Task Recording Sheet

We closed the lesson with a math discussion on strategies students used to count (mainly that they didn't leave the community helpers in pile, but spread them out in a line to ensure accurate counting). 
Community Helpers Math Task Anchor Chart

The beautiful thing about this lesson is that you really can do it any time of the year. It would be a fantastic review on Community Helpers. You could even treat it as a "Count the Room" activity, having students visit various workplaces to count and find out how many there are. If you'd like to try this lesson out in your classroom you can find it here! I hope that you and your students love it as much as mine did! 


CALMING MORNING ROUTINES FOR ELEMENTARY CLASSROOMS

Monday, September 3, 2018


I like to start my school day how I like to start any day: calm, cool, and collected. When I'm home, this means drinking a morning cup of coffee on my couch in peace and quiet. But what about at school with 20+ kindergarteners who are full of energy and ready to socialize?

Regardless of what grade level you teach, you know that school arrival has potential to be hectic. If you're like me, you want to minimize the crazy and maximize the calm. Today I'm sharing a few things you can do to set the mood for the day from the minute your students walk into your classroom.

How do you feel when you play music? Do you get energized with upbeat songs? Do you relax with the soothing acoustic ones? It's the same with kids. Put on relaxing, instrumental music when you get settled in your classroom. Why start it when you get there? Believe it or not, it might relax you too. I've been doing this for the past 5 years now, and it always sets the stage for a calm classroom environment (and a calm teacher). Use a CD or my favorite: YouTube. Some of the videos have kid-friendly images that play. You can display that video or minimize your browser to display anything else you need to.

Here are a few of my favorite instrumental music options from YouTube:


I have found that using visuals in the classroom is helpful for both students and teachers. Visuals show students what they need to be doing, which increases their independence. They also minimizing the amount of talking that you, as the teacher, need to do. The first morning visual I use is a "Good Morning" Procedure slide. I add my specific morning arrival and unpacking routines using words and pictures. Students see this displayed on the board and are reminded of what they need to do without me having to say anything. 


If I see a child that has begun their morning activities, but hasn't followed all of the arrival procedures, I point to the visual and ask: "Have you done these things?". They go down the list and typically realize within seconds what they still need to do. After a few days of using this poster, I don't even need to say anything to my students. I simply show them the poster and it's a nonverbal reminder of what they need to do. 

Want these themed slides for your classroom? You can find them as part of my Morning Meeting Slides resource. 


Another visual I use is this Unpacking Poster. I format it to match the slide above and hold it as students walk in. It's their first nonverbal reminder of what they need to do before going to their tables. You can find the editable poster for free here

In addition to music and visuals, I also have morning tubs set out and ready to go. I always prep these on the Friday before the new week to make sure that I'm not scrambling on Monday morning. At the beginning of the year, I also set the bins out on tables either in the afternoon before I leave (as long as I remember) or first thing in the morning when I arrive. If you're scrambling and feeling frazzled, then your kids will be too. Once my students have their arrival routines down solid, I leave the tubs on labeled spots where they can retrieve them and put them away - but that's for another blog post in the future :) 

Finally, I always make a conscious effort to greet all of my students at the door. I hold my unpacking poster (and my coffee) while greeting them with a "Good Morning" and a wave, high five, or a hug. Greeting students at the door has always minimized the morning crazy. We all have so much that we need to get done, and it can be tempting to be working while your students are coming in (especially as they get more independent). However, I have always found that being present when they first arrive starts their day on a happy, positive note, while also reminding them that you're there to ensure they do what they need to as soon as they walk in your classroom. 

I hope that these simple tips help keep morning arrival calm and positive in your classroom this year!


TEACHER TIMESAVER: HOW TO MAKE LESSON PLANNING EASIER (plus a freebie)

Monday, May 28, 2018
I am always looking for ways to save myself time in my teacher life. One thing that consistently feels like it takes forever is lesson planning. Every week, my team sits down to plan for the upcoming week. For awhile, this became a 2 (or more) hour meeting. Ugh. I love my team, but I don't love making us sit down and lesson plan for that long. Why? Because after we weekly plan, we still have to input our own plans into our teacher planners. Talk about a long process. There had to be a more efficient way.

That's why we started to long-term lesson plan. The time it took us to plan weekly went from several hours to under 1!!  Yes, this does take some time up front. But it's worth it when you think about the time you'll save in the long run.


So, are you ready to start saving time?! Here's how: 
Start by setting up a template that works for you. You'll need a monthly header and a table with the subjects you teach or want to plan for, and the weeks in each month. Not sure how to do this yourself? These monthly planning templates are all ready to go for you with options for 4-8 subjects to plan for OR you can try a printable version of the September Planning Template for free (available at the bottom of this post). 

Now that you have your template set up, you can start inputting your plans for each month. When my team and I are doing this, we put in a general overview for each subject. The overview includes the topic and/or standard we'll be teaching with resources we know we'll be using. We do not include a breakdown for each day of the week in our monthly plans. We save the breakdown for our weekly meetings. 

Once your plans are in your monthly template, you can print or keep it digital for your reference. Every week when my team meets, we refer to our monthly plans. Having this framework helps us hash out each day quickly. It also allows us to come to our meetings prepared with resources we might need for the following week. In addition to coming to meetings prepared, we can also start prepping weeks ahead of time. 


I know that this summer I'll be able to prep for August and September thanks to my Monthly Planning Calendars

Want to try Monthly Planning for one month FREE? Grab a printable version of the September Planning Template by clicking the pink button at the bottom of this post
Need to come back later? Make sure to pin so you can find it when you need it :) 


Have teacher timesaver tips? Feel free to leave them in the comments below :)


AT HOME TEETH WHITENING THAT WORKS & GIVEAWAY

Saturday, April 21, 2018
Hey Teacher Friends,

If there's one thing I know about teachers, it's that we all lead busy lifestyles. Not only do we care for and educate our students all day, but we also do have lives outside of school - believe it or not ;) These past 3 weeks have been the busiest for me in a long time. They consisted of traveling 3 times, writing report cards, and preparing for family events. On top of that, I was drinking my usual 2-3 cups of coffee a day to ensure I had the necessary energy to keep up with my students and busy schedule.

I love coffee. I'm one of those people who really can't function or do anything productive until I've had at least 2 cups. There's only one problem with this... no beautiful white teeth. And it's not just coffee that causes unflattering teeth stains. Did you know that foods like black tea, colored soda, gum, and many others affect the color of your teeth? So even if you get your teacher energy from foods and drinks besides coffee, your teeth can still be affected. 

These are just a few reasons that I was motivated to team up with Smile Brilliant to test the effectiveness of at-home teeth whitening on a busy, coffee-loving teacher. Keep reading to hear about the process and enter a GIVEAWAY!

The Kit
The Smile Brilliant Kit arrives quickly at your doorstep! It's packaged with optimal organization and includes everything you need to create your custom-fit teeth trays right away. The kit also includes simple, step-by-step instructions for taking teeth impressions, sending the impressions back, and the whitening/desensitizing process.

I was so excited to get my kit, I had to snap a picture of it! 

Custom-Fit Trays
When I found out that I'd have to take impressions of my teeth, I felt nervous. I was fairly certain that I would mess this up. However, Smile Brilliant made the process easy to follow. I immediately felt at ease. The kit includes step by step instructions to walk you through exactly how to create the mold. They even include pictures to show what the mold should and should not look like. This was exactly what I needed to ensure I completed the first step accurately. Oh, and get this: they even include extra molds in case you do make a mistake. Phew!

To take your teeth impressions, you mix two molds together, press them into the impression trays, and bite. I love that the instructions detail how long to keep the molds in for and what it should look/feel like when they're ready to be removed. My impressions were made in less than 10 minutes! Once you make your impression trays, simply put them in the envelope provided and stick them in the mail. Your custom-fit whitening trays arrive within days!


Whitening Trays
A quick note about these whitening trays. I was expecting to get hard, uncomfortable trays (you know, like the retainer trays you got from the dentist after getting your braces off? Ugh!) The whitening trays from Smile Brilliant are the exact opposite! They're comfortable and fit my teeth perfectly. There was no pain or uncomfortable feeling when I wore them at all.

Whitening
Whitening my teeth was so easy to do, even with my busy schedule! Simply insert the whitening gel into your custom-fitted whitening trays and gently place them on your teeth. Again, Smile Brilliant provided clear instructions for how to place the trays in so that the gel covers the area of your teeth that you're trying to whiten. You can leave the trays in for 1-3 hours and continue going about your day. Easy peasy.

Since tooth sensitivity during whitening is common, Smile Brilliant also provides you with desensitizing gel. After cleaning and drying your trays, you insert the desensitizing gel. Just as you did with the whitening process, you place the trays on your teeth. This step only lasts 15-20 minutes. I experienced very minimal sensitivity during this process thanks to this step!


The Results
Oh my goodness, you guys. I did not realize how stained my teeth were before this process. Yikes!  To say I'm thankful for the results is not enough. Here are my before and after shots after 14 days of whitening:
Top: Before Picture; Bottom: After Picture
Overall Review
Whitening my teeth with the Smile Brilliant whitening kit was simple and easy to do. The team was great to work with and their instructions were very helpful! I loved that it fit seamlessly in with my busy schedule of work, family events, and hobbies. You know what I loved even more though? Being able to love my smile again with whiter teeth.


DISCOUNT AND GIVEAWAY
Giveaway link: www.smilebrilliant.com/g/teachinglittleleaders
Click to view the kit & apply this 15% off discount code at checkout: teachinglittleleaders15
The giveaway is for a $149 Smile Brilliant credit. It is open for 1 week and open to USA, UK, Australia and Canadian residents. 


Tooth Whitening Gel

SPRING CLASSROOM TRANSFORMATION FOR ELEMENTARY TEACHERS: FREEBIES AND TAKEAWAYS

Friday, March 30, 2018
Hey Teacher Friends,

If you follow me on social media, you might have seen my recent classroom transformation: spring! I've done small room transformations in December with the Polar Express, but this spring, my team and I were determined to do a big one for our kindergarten students. It was such an exciting task, but one that I knew could turn stressful very easily.

Today I'm sharing the components that made up this room transformation, plus a few links to freebies and tips to keep in mind if you're planning a classroom transformation in the near future.


Let's Talk About Planning...
When my team and I decided to do this, we knew ahead of time that our theme for the week was spring. We also knew the content that we wanted to teach for each subject. It just so happened that this was a review week for us. I feel like this made it easier because there was no brand new content involved, and the students were able to help (but more on that later).

Once we knew the skills we'd be reviewing, we were able to create or find resources that were spring themed to use. We added those resources to our planning document.

Prep, Prep, Prep
We knew that prepping everything, from lesson resources to transformation materials, would take time... and we knew that we'd be teacher-tired. For that reason, we set aside planning time during a weekly team meeting to brainstorm what we needed to buy, what we needed to prep, and when we would prep it. I added everything to my free Weekly To Do Lists and separated it out by day.

The plan was to cut out all of the paper we'd be needing by Thursday. Then we'd put a decent chunk of the room transformation decorations up on Friday afternoon after school and leave it up for the entire week after. For me this included the "grass" at the front of the room, the "sun" in the top corner, and the "tree". You can get a look at this process in the video at the bottom of this post.

I got the "garden" for our Mix and Fix Sentence Scramble Center done on Monday morning before the kids got to school.


Here's a look at what the Garden Center looked like up close: 

Making It Interactive
Room transformations can be a lot of work for teachers! Students love to help, so why not let them help with this?? A large chunk of lesson plans from our room transformation week included activities that would display their understanding of a variety of subjects with a spring theme!

Check it out:
The Rainbow Clouds with Fruit Loops were actually a math game. You can find further explanation and a template for the cloud in this blog post from Housing a Forest. Check out this close up picture from one of my students working on this activity: 

These flowers were part of a science review lesson. We talked about the parts of a flower. Students put the flower together. Then they used these labels (printed on bright paper), tape, and string to label the parts.
These word family butterflies were such a fun student-led activity. I gave students anchor chart paper and they worked in groups to write words from different word families. Then they chose a word family and generated words (or nonsense words) for the "family" of their choosing on this free butterfly template from Randi at the Teaching It With Class blog. Check out this close up below:

Finishing Touches: 
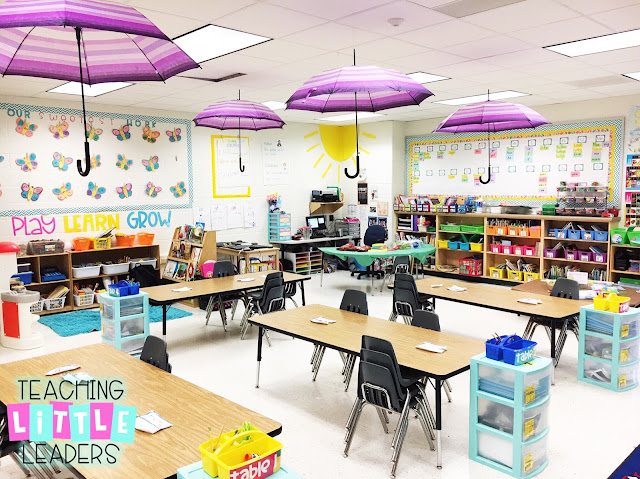
A few finishing touches to our room transformation were the umbrellas (my FAVORITE part), bright tablecloths, and some writing themed snacks for our celebration. The umbrellas and tablecloths were from 5 Below.

Have Fun! 
Like I said... room transformations are a lot of work. If you're stressed, the kids will be too. If you're having fun, so will your kids. Why stress it? Embrace the work and do it for the kids. I had a blast and I know my kids did too. That made it all worth it.

Here's a video look at the process of setting up the room transformation throughout the week. You'll be able to see a few more details that I wasn't able to capture in the pictures... plus a look at how it all came together for a Writer's Picnic Celebration at the end of the week :) Click here or the picture to view the video

Looking to tie it all together with more spring activity fun? Here are Spring Centers that are just right for K:


I hope this gave you some ideas and courage to try a room transformation! If you have any other tips, please share with us in the comments below!


Search This Blog

Powered by Blogger.